Decorating your graduation cap is the one chance to show personality at a ceremony where everyone’s wearing the exact same thing. It’s a small canvas with big potential—whether you’re going for funny, inspirational, sentimental, or just plain beautiful.
Here are graduation cap decoration ideas that range from simple to elaborate, all guaranteed to look good in photos.
Before You Start: The Basics
Check the rules first: Some schools have strict decoration policies while others allow anything goes. Verify what’s permitted before investing time and money. Common restrictions include height limits, nothing hanging off the sides, and no inappropriate content.
Essential supplies:
- Your graduation cap (obviously)
- Hot glue gun and glue sticks
- Fabric, felt, or cardstock for base covering
- Decorative elements (letters, flowers, rhinestones, etc.)
- Scissors and craft knife
- Optional: spray adhesive, E6000 glue for heavy items
Pro tip: Decorate the top surface only and keep designs relatively flat so caps can stack properly. Nothing worse than crushing your masterpiece before the ceremony.
Quote and Letter Designs
The classic approach that never goes out of style.
Inspirational quotes: Choose quotes that meant something during your academic journey. Popular options include “She believed she could, so she did,” “The tassel was worth the hassle,” or “And so the adventure begins.” Keep quotes short enough to read from a distance—three lines maximum works best.
How to execute it well: Use vinyl letter stickers for a clean, professional look, or print letters on cardstock and cut them out. Cover the cap base with fabric or decorative paper first, then arrange letters carefully before gluing. Add flourishes like small flowers, stars, or simple borders to frame the text.
Font matters: Choose readable fonts over overly decorative ones. Script fonts look elegant but can be hard to read from afar. Block letters or clean cursive work best for visibility in photos.
Glitter and Rhinestone Glamour
For anyone who wants to sparkle across the stage.
Full glitter coverage: Cover the entire cap surface with glitter for maximum sparkle. Use spray adhesive or a thin layer of mod podge, then sprinkle glitter generously. Let dry completely and seal with a clear spray sealant. Choose school colors or go for gold and silver classics.
Rhinestone designs: Create patterns, initials, or shapes using rhinestones. Spell out your graduation year, create a border design, or make geometric patterns. Use E6000 glue for rhinestones since hot glue doesn’t hold as well. Plan your design first with a pencil outline.
Combination approach: Glitter background with rhinestone lettering or accents creates dimension and visual interest. This looks especially stunning in photos and catches light beautifully during the ceremony.

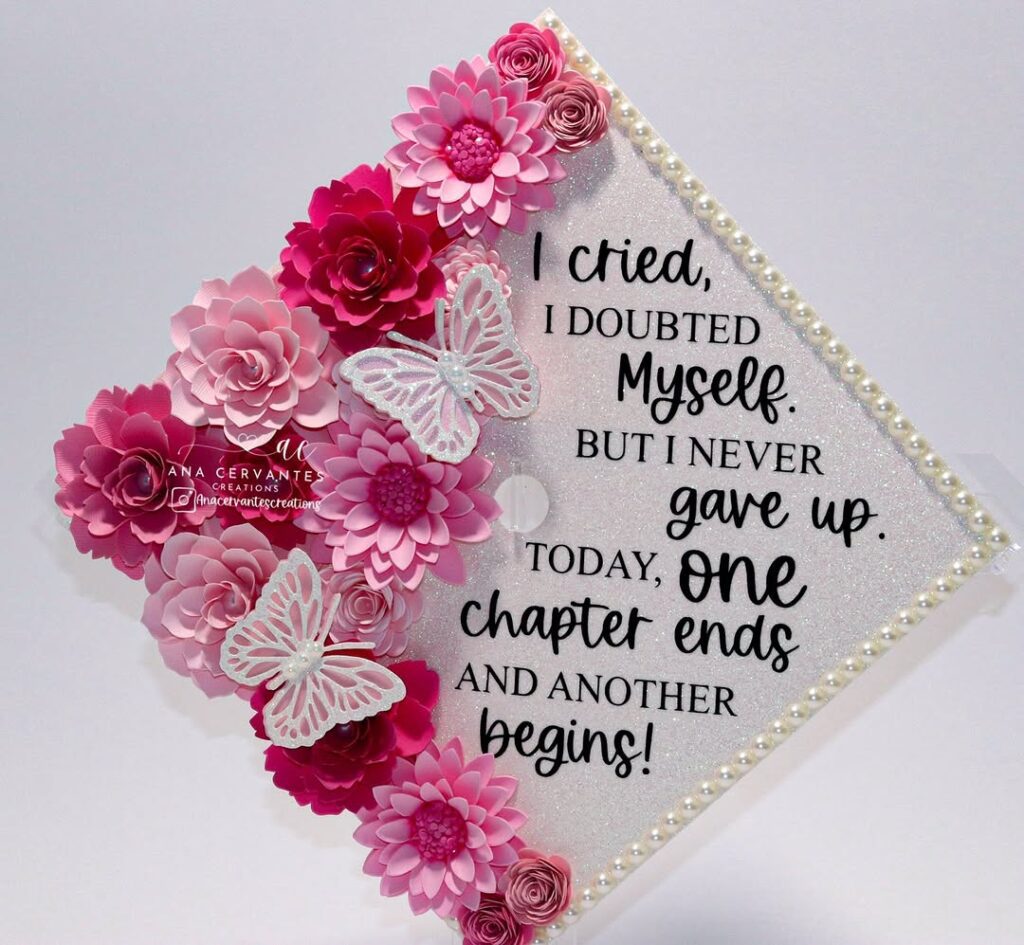
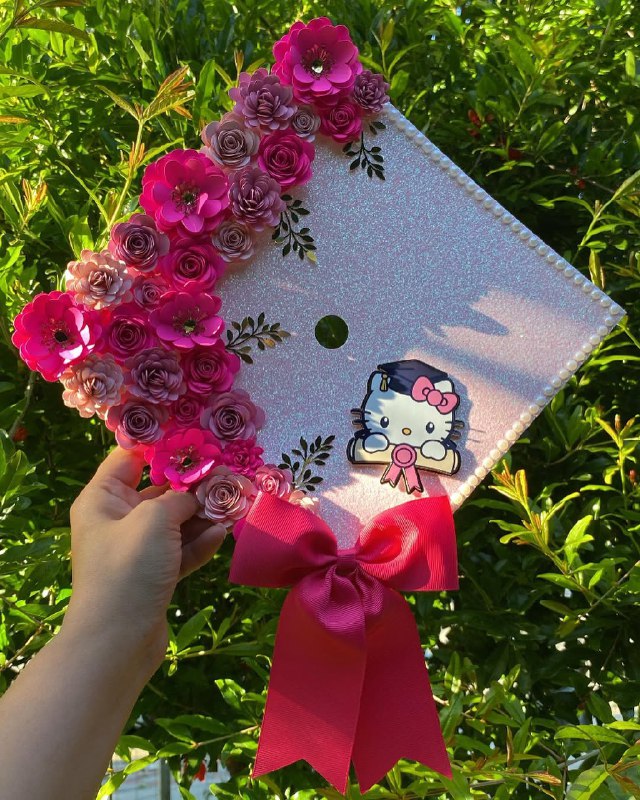
Floral and Nature Themes
Beautiful, feminine, and incredibly photogenic.
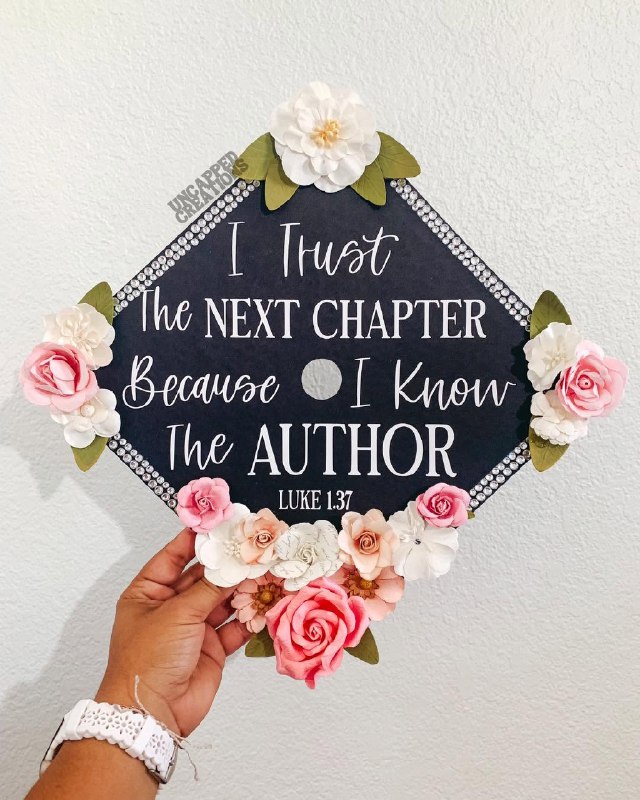
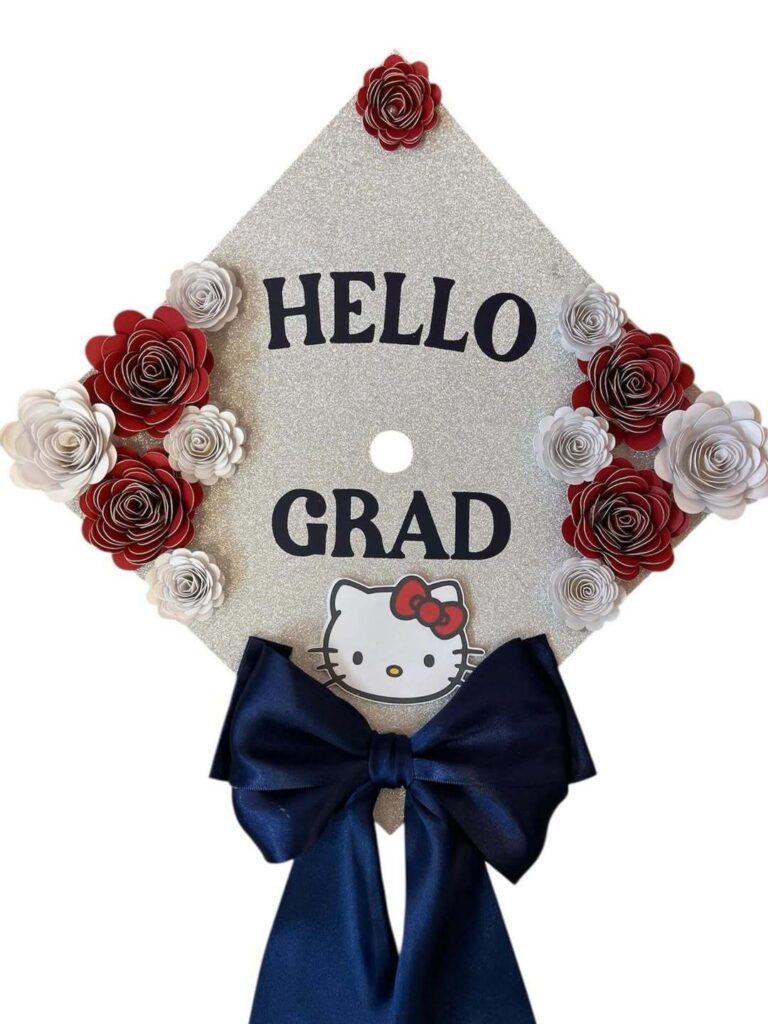
Flower corner cluster: Arrange artificial flowers in one corner of the cap for an elegant, asymmetrical look. Use flowers in complementary colors—white and greenery, pastels, or bold colors that pop against the black cap. Add greenery, baby’s breath, or ribbon for fullness.
Full floral coverage: Cover the entire cap surface with flowers for a dramatic statement. This works beautifully for spring graduations. Use a mix of flower sizes and include greenery to fill gaps. Hot glue works well for securing lightweight artificial flowers.
Pressed flower design: For a delicate, artistic approach, arrange pressed flowers on the cap and seal with mod podge or clear sealant. This creates a beautiful, nature-inspired design that’s unique and personal.
Nature elements: Incorporate butterflies, bees, leaves, or vines alongside or instead of flowers for variety. These elements add movement and interest to floral designs.

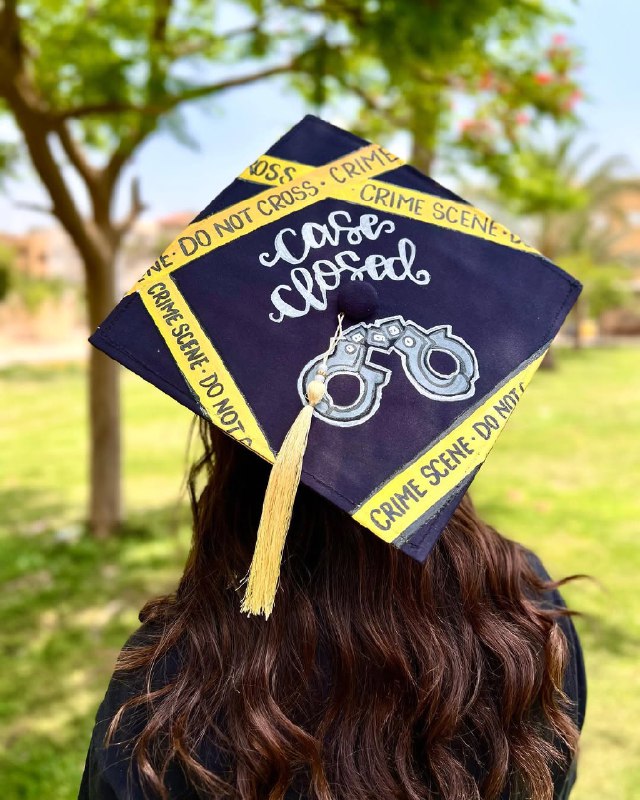
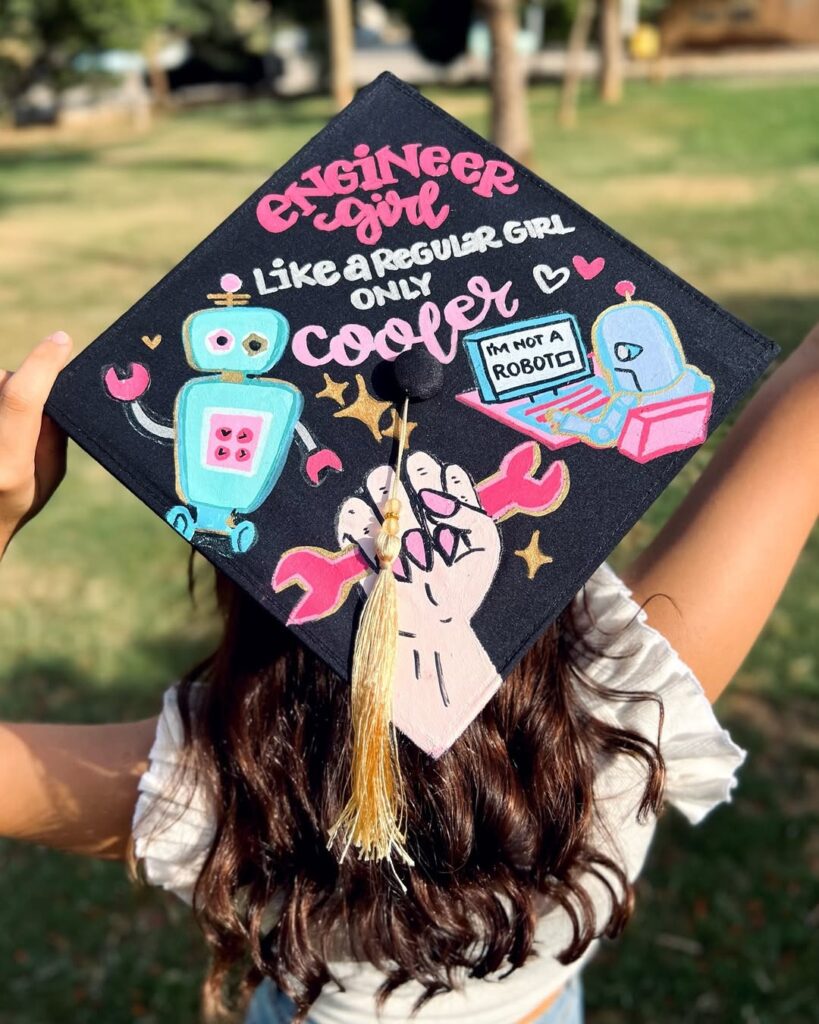
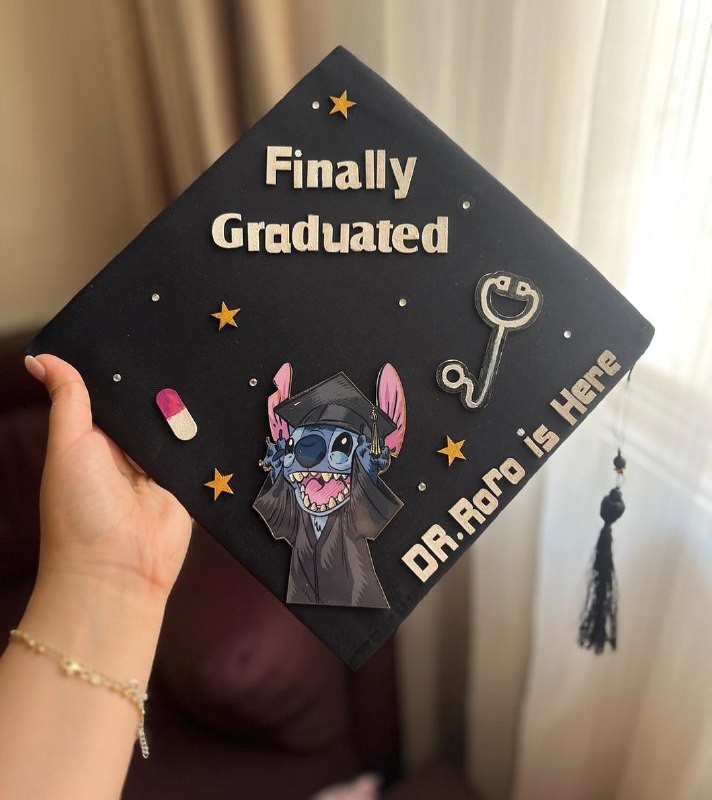
Major and Career-Specific Designs
Show what you studied and where you’re headed.
Education majors: Apple decorations, ABC letters, rulers, pencils, or “I teach, what’s your superpower?” Books stacked on the cap or a chalkboard design work well.
Nursing and medical: Stethoscope outline, heartbeat line, medical cross, “RN” or “BSN” in large letters. Anatomy references or “saving lives” themes are popular.
Engineering: Blueprints, gears, circuit designs, or math equations. “Engineer in training” or subject-specific formulas make great centerpieces.
Business: Stock market charts, “CEO in the making,” dollar signs, or business-related quotes. Keep it professional but creative.
Arts and creative fields: Paint palettes, music notes, cameras, theater masks, or other symbols of your craft. Get creative with actual materials from your field.
STEM fields: Periodic table elements spelling your name, DNA double helix, beakers and atoms, or relevant equations. Science puns work great here too.
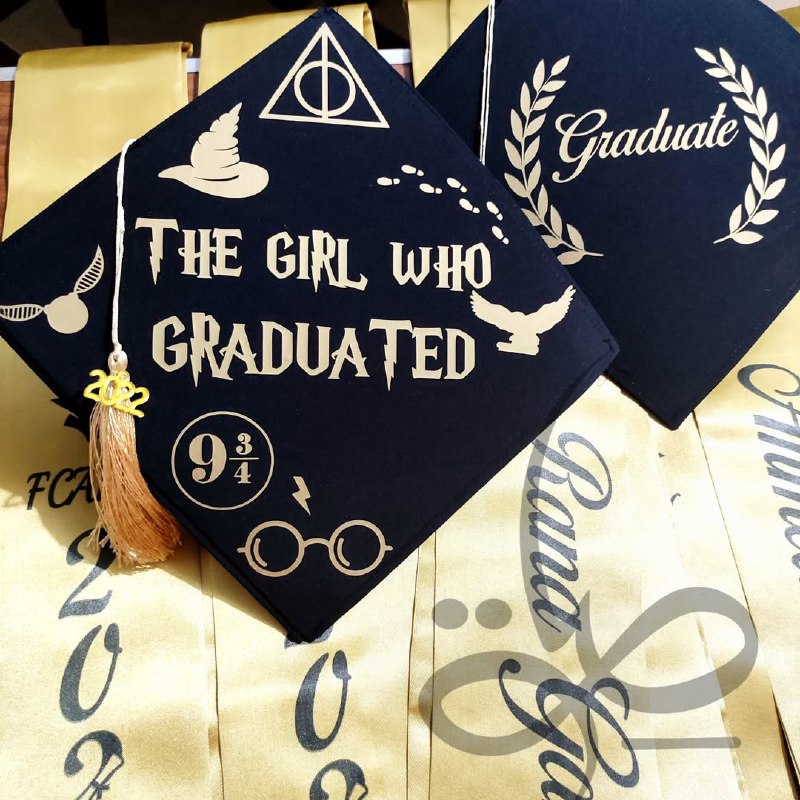
Pop Culture and Fandom References
For the unapologetically nerdy (in the best way).
Movie and TV quotes: Harry Potter references are graduation cap staples—”Mischief managed,” “After all this time? Always,” or house crests. Other popular choices include “I am inevitable” (Marvel), “May the force be with you” (Star Wars), or Disney quotes.
Music lyrics: Meaningful song lyrics from your college anthem or personal favorite. Keep it to one powerful line that resonates. Make sure lyrics are appropriate for the ceremony.
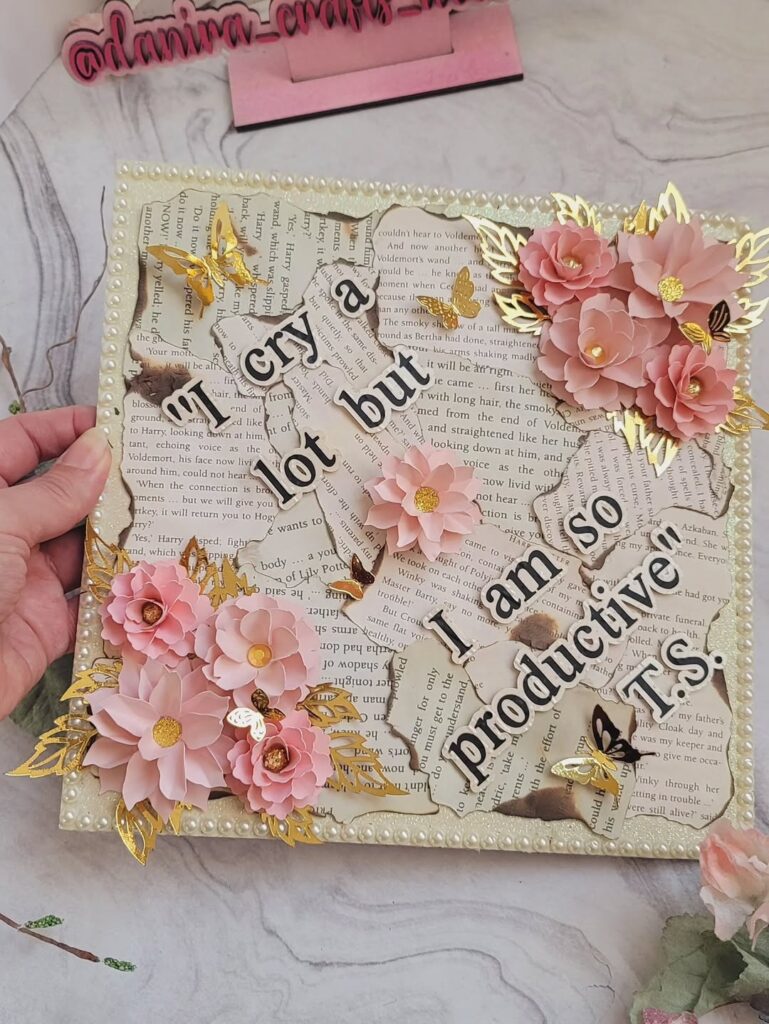
Book references: Literary quotes, book spines from favorite novels, or references to beloved characters. English majors especially love this approach.
Video game and anime: References to games or shows that got you through tough semesters. Keep it recognizable enough that others get the reference.

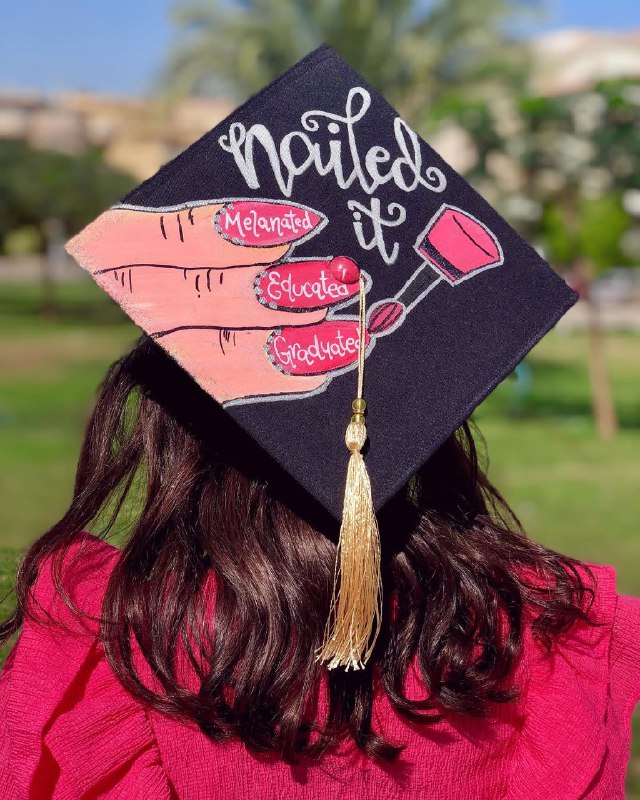
Funny and Punny Designs
Make people smile as you walk across the stage.
Self-deprecating humor: “This wasn’t part of my Netflix plan,” “Still don’t know what I’m doing,” or “Thanks Google and Coffee.” Relatability is key.
Debt jokes: “Financially irresponsible since [year],” “Student loans have entered the chat,” or simply a receipt showing your tuition total. Dark humor that everyone understands.
Major-specific puns: “Periodically losing electrons but staying positive” (Chemistry), “History in the making” (History), “Write this down, I’m making history” (any major).
Short and punchy: “Brb, conquering the world,” “Nailed it,” or “Plot twist: I graduated.” Simple statements often land better than elaborate jokes.

Cultural and Heritage Celebrations
Honor your background and identity.
Flag incorporation: Feature your cultural heritage flag alongside American flag or school colors. This celebrates your roots while marking your achievement.
Language representation: Write messages in your native language or include phrases from your cultural background. This personalizes your cap and represents your identity.
Cultural symbols: Incorporate traditional patterns, symbols, or imagery from your heritage. This creates meaningful decoration that celebrates who you are.
Family tributes: “First generation graduate,” “Lo hice/I did it,” or dedications to family members who supported your journey. These deeply personal touches often mean the most.
Thank You and Dedication Caps
Show gratitude to those who helped you get here.
Family dedications: “Mom and Dad, I did it,” “For my family,” or names of people who supported you. Photos of family members can be incorporated tastefully.
In memory tributes: Dedicate caps to loved ones who passed away with “In loving memory of [name]” or “This one’s for you.” Add dates, small photos, or symbols like angels or hearts.
Gratitude messages: “Thanks Mom,” “Shoutout to coffee and determination,” or listing everyone who helped along the way. Keep it heartfelt without getting too wordy.
Religious faith: Bible verses, “God is good,” “Blessed,” or other faith-based messages. These work well combined with simple design elements like crosses or doves.
Minimalist and Modern Designs
For those who prefer clean, simple aesthetics.
Single word impact: One powerful word in large letters: “Blessed,” “Worthy,” “Finally,” “Unstoppable.” The simplicity makes a strong statement.
Geometric patterns: Clean lines, triangles, chevrons, or other geometric designs in metallic or contrasting colors. Modern and sophisticated without being busy.
Monochrome elegance: All white, all gold, or all silver designs that elevate the black cap with a single coordinating color. Less is more.
Simple border: A decorative border around the edge with your graduation year in the center. Classic and timeless without being flashy.

Destinations and Future Plans
Share where you’re going next.
Graduate school bound: Name of your grad school, “Not done yet,” or degree you’re pursuing next. Show you’re continuing the journey.
Career announcements: “Future [job title],” company logos (if you have a job lined up), or field you’re entering. Celebrate having a plan.
Travel plans: If taking a gap year or traveling, feature maps, passport stamps, or destinations you’ll visit. “Adventure awaits” works well here.
Location moves: Moving to a new city? Feature that city’s skyline or iconic landmarks. “California here I come” or similar destination announcements.

DIY Tips for Best Results
Plan and sketch first: Draw your design on paper before touching the actual cap. This helps with spacing and ensures everything fits properly.
Layer your base: Cover the cap with fabric or decorative paper first for better adhesion and a cleaner look. Black caps show glue marks easily, so a base layer helps.
Use proper adhesive: Hot glue for lightweight items, E6000 or super glue for heavy embellishments. Test adhesives on scraps first to ensure they work with your materials.
Work from center out: Start with central design elements and work toward edges. This ensures your focal point is properly positioned.
Keep it balanced: Distribute visual weight evenly. An off-center design can work, but make sure the cap doesn’t look lopsided.
Test readability: Take photos from a distance to ensure text is readable. What looks good up close might not read well from far away.
Seal if needed: Glitter and delicate elements benefit from a clear sealant spray. This prevents glitter fallout and protects your work.
What to Avoid
Too much height: Designs that stick up too much won’t stack and might violate school rules. Keep embellishments relatively flat.
Anything inappropriate: Even if it’s funny to you, remember family and grandparents will see photos. Keep it celebration-appropriate.
Overcrowding: Too many ideas crammed onto one cap looks messy. Choose one main theme and execute it well.
Poor quality materials: Cheap letters that fall off or decorations that don’t photograph well waste your effort. Invest in decent materials.
Last minute rushing: Decorating caps takes longer than expected. Start early to avoid stress and ensure proper drying time.

Photography Considerations
Your decorated cap will be in countless photos, so make it photogenic.
High contrast works best: Designs with strong color contrast against the black cap show up better in photos. Pastels can wash out, so consider adding darker accents.
Consider the angle: Most grad photos are taken from the front, not directly overhead. Make sure your design looks good from the front-facing angle too.
Reflective elements photograph well: Glitter, rhinestones, and metallic elements catch light and look great in photos, especially in bright outdoor ceremonies.
Test with your phone: Take photos of your finished cap in different lighting to ensure it photographs well. Make adjustments if needed.
Preservation After Graduation
Shadow box display: Frame your cap in a shadow box with your diploma, graduation photo, and other memorabilia. This creates a beautiful keepsake display.
Photo documentation: Take detailed photos of your cap from multiple angles before and during graduation. Even if the cap itself gets damaged, you’ll have the memory.
Careful storage: If keeping the actual cap, store flat in a box away from moisture and extreme temperatures. Place tissue paper over decorations to prevent crushing.
Repurpose elements: Remove flowers, letters, or special elements to use in other memory projects if you don’t want to keep the whole cap.
Making It Meaningful
The best graduation caps aren’t necessarily the most elaborate—they’re the ones that mean something to the graduate. Whether it’s a simple quote that got you through finals, flowers in your mom’s favorite color, or a reference to inside jokes with friends, personal meaning trumps Pinterest-perfect every time.
Your graduation cap is a celebration of your achievement and a reflection of your personality. It’s okay if it’s simple, funny, emotional, or completely unique. The only requirement is that it feels like you.
So grab your supplies, put on some music, and create something that makes you smile. You earned this moment—make your cap as special as the accomplishment it represents.