I finally dedicated a space to my crafting this year, and organizing it properly has made such a difference. Instead of spending half my creative time looking for supplies or clearing space to work, I can just sit down and start creating. A well-organized craft room means more time actually crafting and less time dealing with chaos.
Whether you have a full room or just a corner, here are some organization ideas to help you create a functional, inspiring craft space.
Start With a Clear Vision
Before buying storage solutions, think about what you actually do in your craft space.
Do you sew, scrapbook, paint, make jewelry, or do multiple crafts? Each activity needs different storage and workspace solutions. Consider what supplies you use most often and what projects you’re currently working on. Think about your creative process and how you like to work.
Understanding your specific needs helps you create a system that supports your creativity rather than fighting against it.

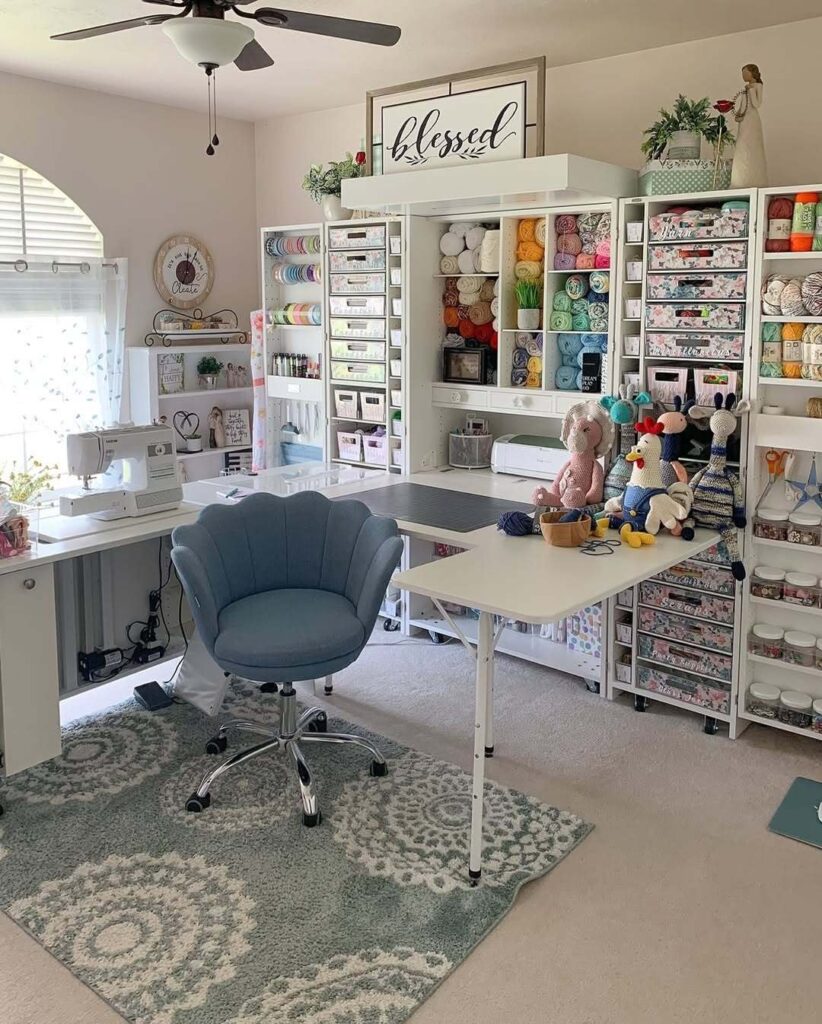
The Work Surface
Your work table is the heart of your craft room.
Size matters: Get the largest work surface your space allows. Crafting often requires spreading out materials and projects.
Height consideration: Make sure your table is at a comfortable height for sitting or standing, depending on how you like to work.
Multiple surfaces: If space allows, have different work areas for different activities—a cutting table, a painting station, a computer desk.
Protective covering: Use a cutting mat, craft mat, or protective surface that you can easily clean or replace.
Rolling cart: A mobile cart can serve as an additional work surface that moves where you need it.

Vertical Storage Solutions
When floor space is limited, go up.
Wall-mounted pegboard: One of the most versatile craft storage solutions. Hang tools, scissors, ribbons, and frequently used supplies. Customize with hooks, baskets, and shelves.
Floating shelves: Display pretty supplies like yarn, fabric, or finished projects while keeping them accessible.
Wall-mounted bins: Clear wall-mounted containers let you see contents at a glance.
Grid panels: Metal or wire grid systems with hooks and baskets offer flexible storage.
Magnetic strips: Perfect for holding metal tools like scissors, craft knives, and small metal containers.
Behind the door: Over-the-door organizers maximize unused space for ribbons, small tools, or paper.
Using vertical space keeps your work surface clear and everything visible.

Clear Storage Containers
Being able to see what you have is essential for crafters.
Plastic bins with lids: Stackable and protects supplies from dust. Label clearly on multiple sides.
Clear drawers: Rolling carts with clear drawers are perfect for small supplies sorted by category.
Glass jars: Beautiful for displaying buttons, beads, sequins, and other small notions.
Acrylic organizers: Desktop organizers with compartments for frequently used tools.
Shoe organizers: Hanging shoe organizers work great for yarn, fabric scraps, or paint bottles.
Clear storage means you won’t buy duplicates because you couldn’t see what you already had.

Sorting and Categorizing
Good organization starts with logical categories.
By project type: Keep all supplies for a specific craft together—all sewing supplies, all painting supplies, etc.
By color: Organize papers, fabric, yarn, or ribbons by color for easy coordination and visual appeal.
By frequency of use: Keep everyday supplies at arm’s reach, seasonal or occasional items stored higher or in back.
By project: Use project boxes or bins to keep everything for current projects together.
By size: Group similar-sized items together for efficient storage.
Choose a system that matches how your brain works.

Ribbon and Trim Storage
Ribbons can quickly become a tangled mess without proper storage.
Ribbon dispensers: Wall-mounted or countertop ribbon holders let you pull ribbon without tangles.
Dowel rod system: Mount dowels on a wall or inside a cabinet door, thread ribbons onto them.
Clothespins on a rod: Clip ribbon ends to clothespins attached to a rod or wire.
Plastic bags: For ribbons you don’t use often, store in labeled ziplock bags sorted by color or type.
Wrapping paper organizer: Repurpose a wrapping paper organizer for storing ribbon spools.
Paper Storage
If you work with paper, proper storage prevents damage and makes selection easy.
Vertical file sorters: Store cardstock and patterned paper upright by color or theme.
Paper racks: Horizontal paper storage racks stack paper flat, sorted by type.
Magazine holders: Great for storing paper pads or grouping related papers together.
Photo boxes: Perfect size for 12×12 scrapbook paper, protects from light and damage.
Binders with sheet protectors: Store delicate or special papers in protective sleeves.
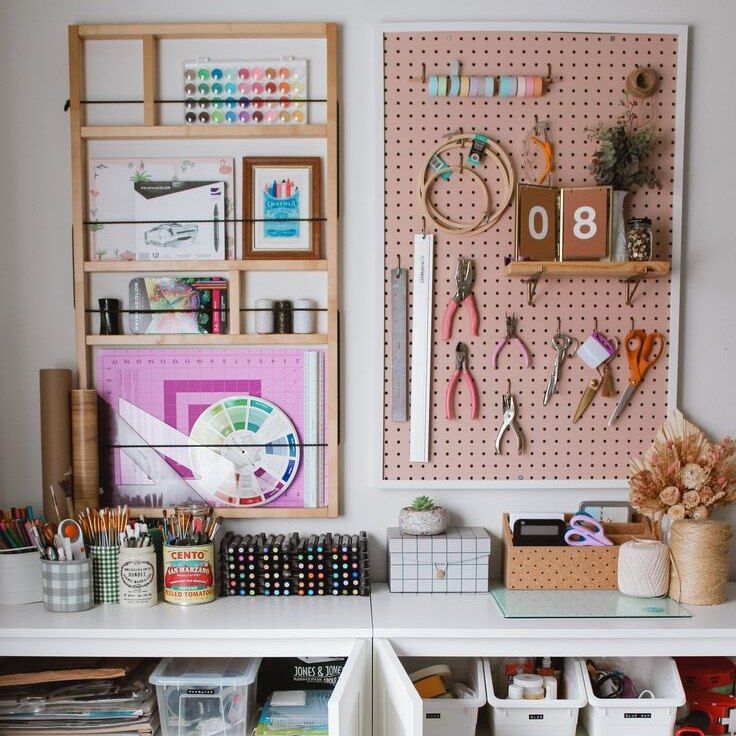
Tool Organization
Keep your tools accessible and in good condition.
Tool caddy: A portable caddy with compartments keeps frequently used tools together and moves with you.
Magnetic strip: Mount on wall for scissors, craft knives, and metal tools.
Cup or jar organizers: Keep pens, pencils, brushes, and markers upright in containers on your desk.
Drawer dividers: Organize tools in drawers so they don’t become a jumbled mess.
Tool roll: Fabric tool rolls protect delicate tools and keep sets together.
Foam inserts: Cut foam to fit tools exactly, so everything has a designated spot.

Fabric and Yarn Storage
Textile crafters need special storage solutions.
Fabric folded on shelves: Fold fabric like in a store and stack by color or type on open shelving.
Comic book boards: Wrap fabric around comic book boards for uniform, stackable storage.
Clear bins: Store fabric collections in labeled bins sorted by color, type, or project.
Yarn in baskets: Woven baskets look beautiful and keep yarn contained while allowing air circulation.
Yarn organizer bags: Clear bags with handles for storing yarn by color family or project.
Cubby storage: Cube organizers with fabric bins perfect for yarn and larger fabric pieces.

Small Supplies Management
The little stuff is often the hardest to organize.
Divided containers: Tackle boxes or bead organizers with multiple compartments.
Small drawer units: Desktop drawer sets perfect for buttons, beads, sequins, and findings.
Mason jars: Display and organize small notions while keeping them dust-free.
Ice cube trays: In drawers, they create perfect compartments for tiny items.
Pill organizers: Great for very small items like seed beads or tiny embellishments.
Magnetic tins: Stick to magnetic surfaces and keep small metal items organized.
Labeling System
Labels are essential for maintaining any organization system.
Label maker: Creates uniform, professional-looking labels that are easy to read.
Chalkboard labels: Reusable labels you can change as contents change.
Clear tape over paper: Handwritten labels covered with clear tape are waterproof and durable.
Color coding: Use different colored labels or containers for different craft categories.
Include details: Label with both category and specific contents when helpful.
Picture labels: Photos of contents help if multiple people use the space or for visual reference.

Creating Zones
Divide your craft room into functional areas.
Active project zone: Space for projects currently in progress with supplies easily accessible.
Storage zone: Shelving and containers for supplies not currently in use.
Inspiration zone: Area for idea books, magazines, Pinterest boards, or sample projects.
Work zone: Main table or desk where you actually create.
Finishing zone: Space for photographing, packaging, or preparing completed items.
Clear zones make the room more functional and prevent one mess from taking over everything.
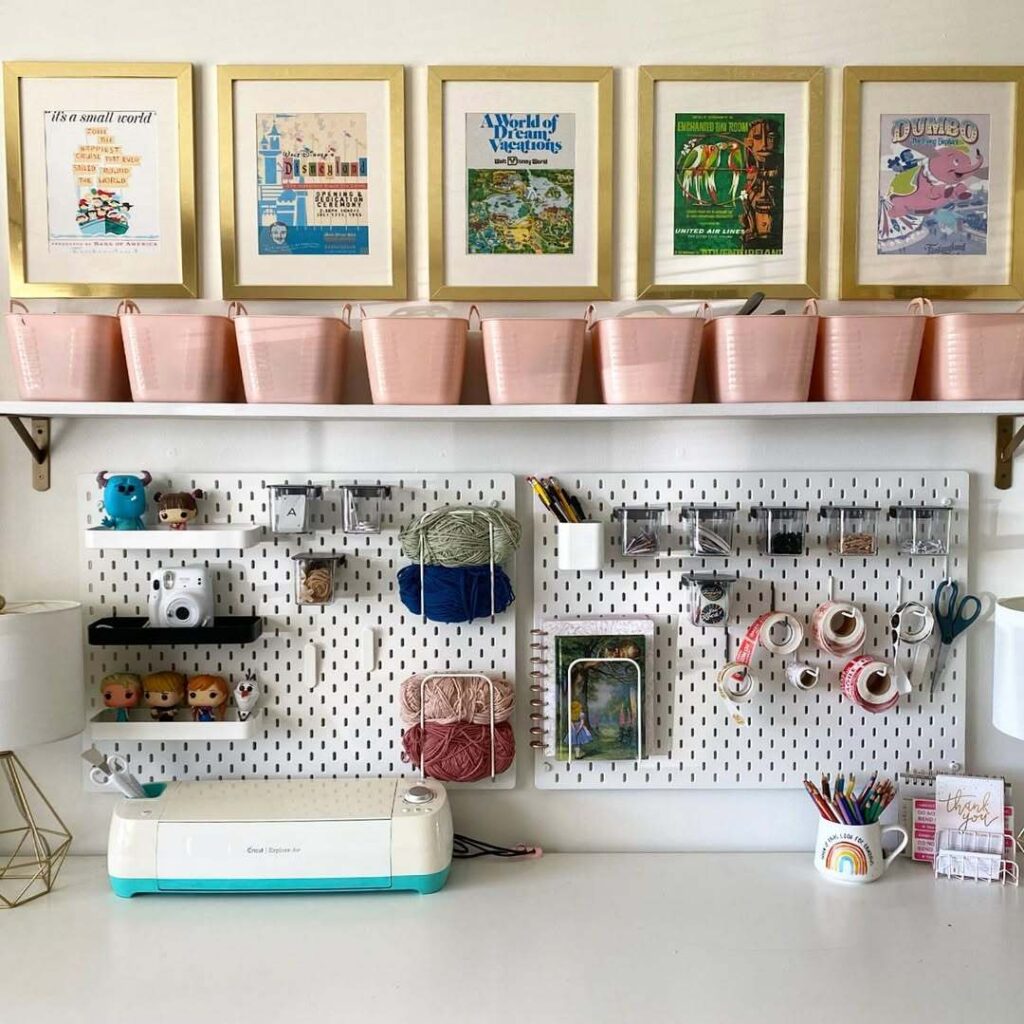
Display as Storage
Some supplies are too pretty to hide away.
Glass jars on shelves: Buttons, beads, pompoms, and colorful supplies become decor.
Vintage containers: Display supplies in antique tins, boxes, or baskets.
Open shelving: Show off fabric collections, yarn, or organized supplies.
Shadow boxes: Frame special supplies or vintage notions as art.
Color-coordinated: Arrange visible storage by color for visual impact.
Beautiful storage makes your space more inspiring and enjoyable to work in.
Scrap Management
Don’t let scraps take over your craft room.
Scrap bins: Dedicated containers for fabric scraps, paper scraps, yarn ends, etc.
Size sorting: Organize scraps by size—large usable pieces separate from tiny bits.
Regular purging: Monthly, go through scraps and discard anything too small to realistically use.
Scrap projects: Keep ideas for using scraps so they become useful rather than clutter.
Color sorting: Sort fabric or paper scraps by color for easy selection.
Small Space Solutions
You don’t need a full room to have an organized craft space.
Closet conversion: Transform a closet into a craft nook with shelving and a fold-down desk.
Cabinet storage: Use a cabinet or armoire that closes to hide supplies when not in use.
Under-bed storage: Flat containers under the bed store less-used supplies.
Wall-mounted fold-down table: Creates work surface when needed, folds away when not.
Multi-purpose furniture: Use furniture that serves dual purposes—ottoman with storage inside.
The Creative Reward
A well-organized craft room isn’t about perfection or looking like a magazine photo. It’s about creating a space that supports your creativity and makes crafting more enjoyable.
You should be able to find what you need quickly, have room to work comfortably, and feel inspired when you enter your space. That’s the goal of craft room organization.
Take it one step at a time. Start with your most frustrating area and work from there. The time you invest in organizing pays off every time you sit down to create.