I made my own Valentine’s cards last year and honestly, people were way more excited about the handmade card than whatever gift I gave them. There’s something about receiving something someone actually made with their hands that just hits different.
The good news? You don’t need to be artistic or crafty to make cards that look beautiful and thoughtful. Most of these ideas use simple techniques and materials you probably already have or can grab at any craft store for cheap.
Let me walk you through some card ideas that range from elegantly simple to beautifully detailed.

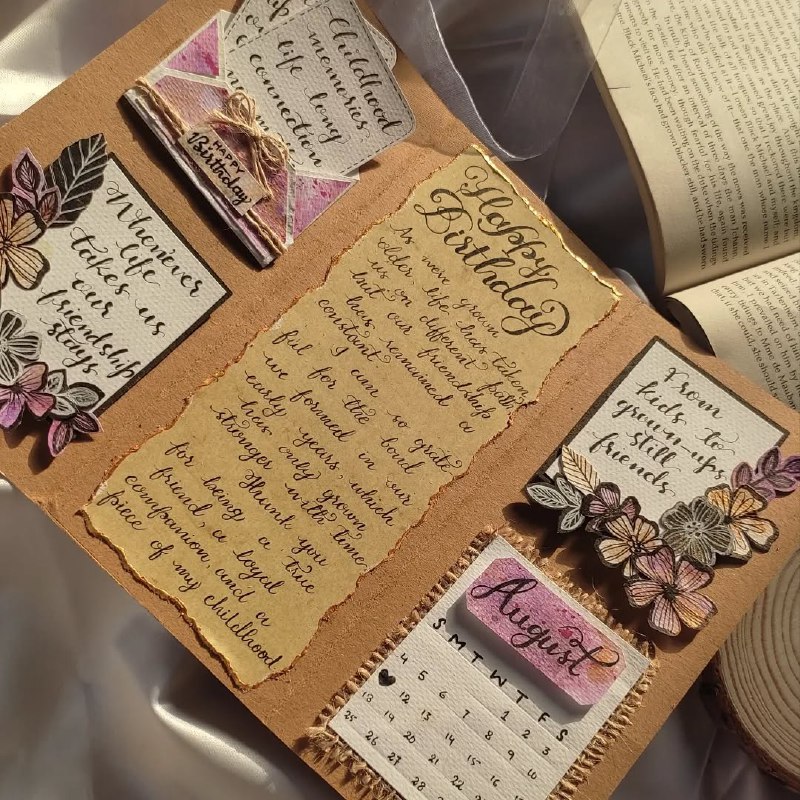
Victorian Love Letter Card
This one feels romantic and vintage in the best way.
Start with cream or aged-looking cardstock as your base. You can tea-stain white cardstock by brewing strong tea, letting it cool, and lightly brushing it on the paper. Let it dry completely for that aged parchment look. Write your message in cursive with a fountain pen or nice black pen, or print out a romantic quote or poem in an elegant font.
Roll the paper into a scroll and tie it with a thin red ribbon or vintage lace. You can seal it with a wax seal if you want to go all out (wax seal kits are pretty affordable online). Tuck the scroll into a small envelope decorated with pressed flowers, lace trim, or vintage stamps.
The whole vibe is “love letter from another era” and it’s incredibly romantic without being cheesy. Add a dried rose petal or sprig of lavender inside for an extra sensory element.
Lace Collage Card
Lace instantly makes everything look more elegant and romantic.
Cut a piece of vintage or new lace and layer it on your card front. You can glue it down completely or just tack down the edges so it has dimension. Layer different types of lace for more texture and visual interest. Mix lace with other materials like doilies, ribbon, or buttons for a mixed media collage effect.
Add your sentiment on top using stamped words, letter stickers, or handwriting on a separate piece of paper that you layer on top. Keep the color palette soft: whites, creams, blush pinks, and touches of gold.
I made one using a cream card base, a piece of vintage lace my grandmother gave me, and a simple “love you” stamped in gold. It looked expensive and thoughtful, and the materials cost maybe three dollars.
Interactive Flap Card
These are more playful and fun, perfect if your relationship has a sense of humor.
Create a card where the front has a flap or door that opens to reveal a hidden message inside. Cut a heart shape in the front of your card, leaving one side attached so it opens like a door. Behind it, write or draw something sweet.
You can also create multiple flaps with different messages or drawings behind each one. Think “Open when you need a smile” style flaps with little notes or doodles underneath. Use small envelopes glued to the inside of the card, each containing a different note or reason why you love them.
Another version is the pull-tab card where you pull a tab and a hidden message slides out. There are templates online if you want to get technical, or you can improvise with paper strips and creative folding.

Watercolor Heart Card
If you have watercolors, this is surprisingly easy and looks really artistic.
Paint a simple heart shape with watercolors in reds, pinks, and purples, letting the colors blend together. You don’t need to be good at painting. Abstract, blended hearts look beautiful and intentional. Let it dry completely, then add your message with a pen or letter stickers.
For a variation, paint a watercolor background wash in romantic colors, let it dry, and then add hearts or other designs on top with markers or pens. The watercolor gives it an artistic, handmade feel that looks way more impressive than the skill required.
Mount your watercolor piece on a slightly larger card base in a contrasting color for a matted, professional look.
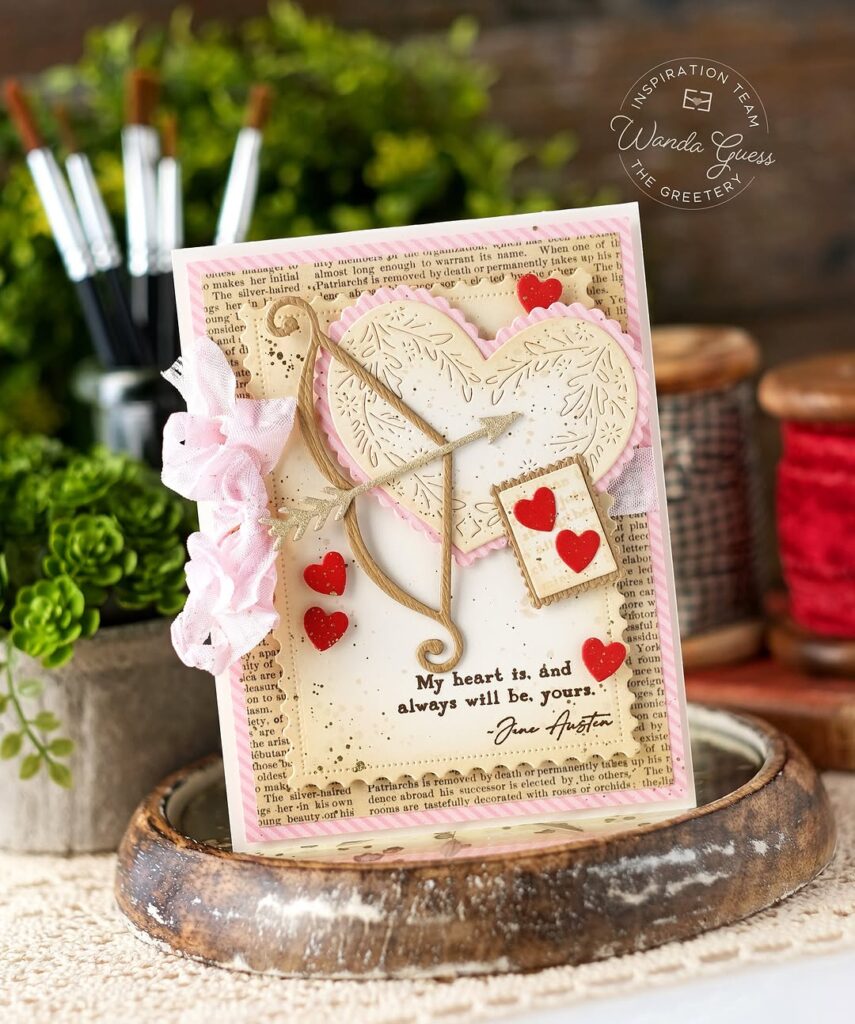
Embossed and Textured Card
Add dimension with embossing or texture.
Use embossing folders with your cardstock to create raised patterns. Hearts, flowers, or geometric patterns all work beautifully. If you don’t have embossing folders, create texture by drawing designs with a glue pen and sprinkling embossing powder on top, then heating it with an embossing gun (or carefully with a hair dryer).
Layer different textures on your card: smooth paper with rough burlap, glossy elements with matte backgrounds, or flat paper with dimensional foam dots lifting certain elements off the page.
Even something as simple as running cardstock through an embossing folder creates visual interest that makes your card look professionally made.
Pop-Up Heart Card
Classic but always delightful.
The easiest version is cutting two parallel slits in the center fold of your card, pushing that section forward to create a pop-up tab, and gluing a heart shape to it. When the card opens, the heart pops up.
You can get more elaborate with multiple layers or different shapes, but even a simple single pop-up element makes the card feel special and interactive. There are tons of templates online if you want to try more complex designs.
Kids love these, but honestly, adults do too. There’s something universally charming about opening a card and having something pop up at you.
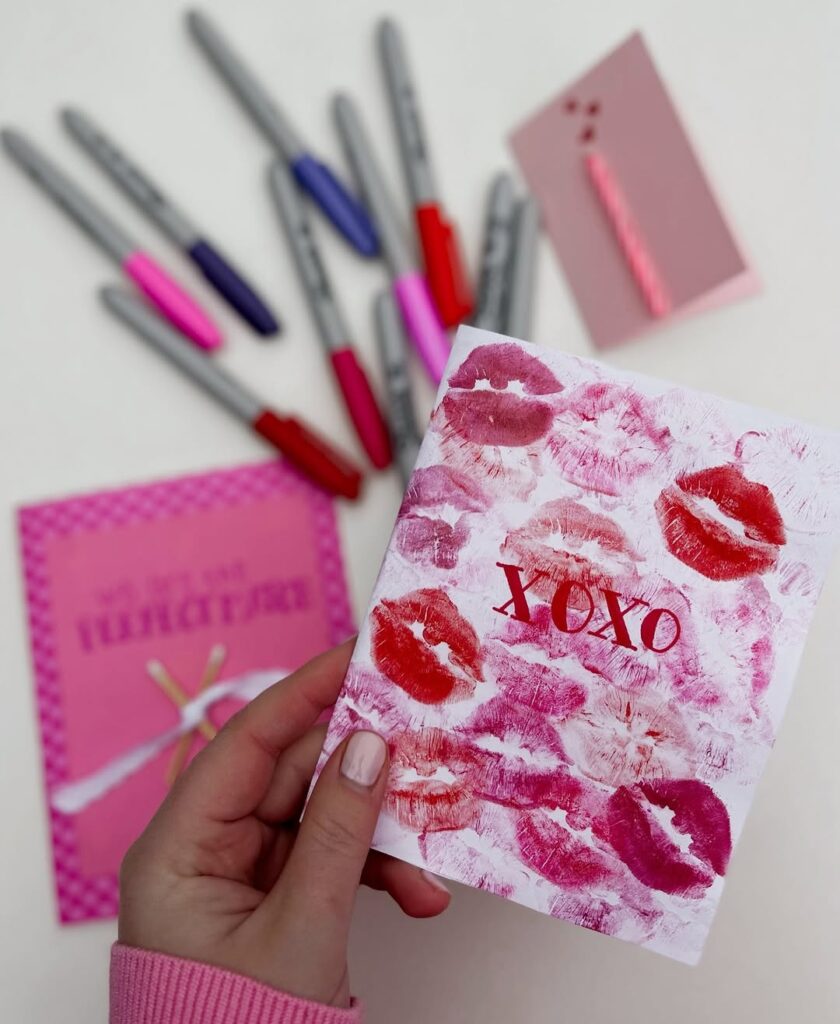
Minimalist Typography Card
For when less is more.
Use beautiful typography as the main design element. Write or stamp a single word like “Love” or a short phrase in elegant lettering. Keep everything else minimal: white or cream card, black or gold lettering, maybe one small decorative element.
You can also spell out your message using different fonts or sizes for each letter, creating visual interest through typography alone. Letter stamps, stickers, or printed text all work.
The simplicity makes it feel modern and sophisticated. Sometimes the most impactful cards are the ones that don’t try too hard.
Stitched Heart Card
Add actual sewing to your card for unique texture.
Draw or print a heart outline on your card. Use a needle and embroidery floss to stitch around the outline. You can do a simple running stitch, backstitch, or even cross-stitch if you’re feeling ambitious. The thread adds color and texture that’s unexpected on a card.
For an easier version, use a sewing machine to stitch designs directly on cardstock before folding it into a card. Stitched borders, hearts, or simple line designs all look great.
You can also stitch buttons onto your card, attaching them with colorful thread that becomes part of the design.
Quilled Paper Card
Paper quilling looks intricate but is actually pretty straightforward.
Roll thin strips of paper into coils, pinch them into different shapes (teardrops, hearts, circles), and glue them onto your card to create designs. You can make flowers, hearts, or abstract patterns.
Quilling tools are cheap, or you can use a toothpick to roll the paper. Craft stores sell pre-cut quilling strips in tons of colors, or you can cut your own from cardstock.
Even a simple quilled heart in the center of a card looks impressive and handmade in the best way.
Photo Collage Card
Make it personal with photos.
Print small photos of you and your recipient and arrange them in a collage on the card front. Cut them into heart shapes, arrange them in a grid, or overlap them for a scrapbook feel. Add decorative elements like washi tape, stickers, or hand-drawn doodles around the photos.
You can also do a single photo as the focal point with a decorative frame drawn or glued around it. Write little notes or memories around the photos for extra sentimentality.
This works especially well for partners, best friends, or family members where you have lots of shared memories to celebrate.
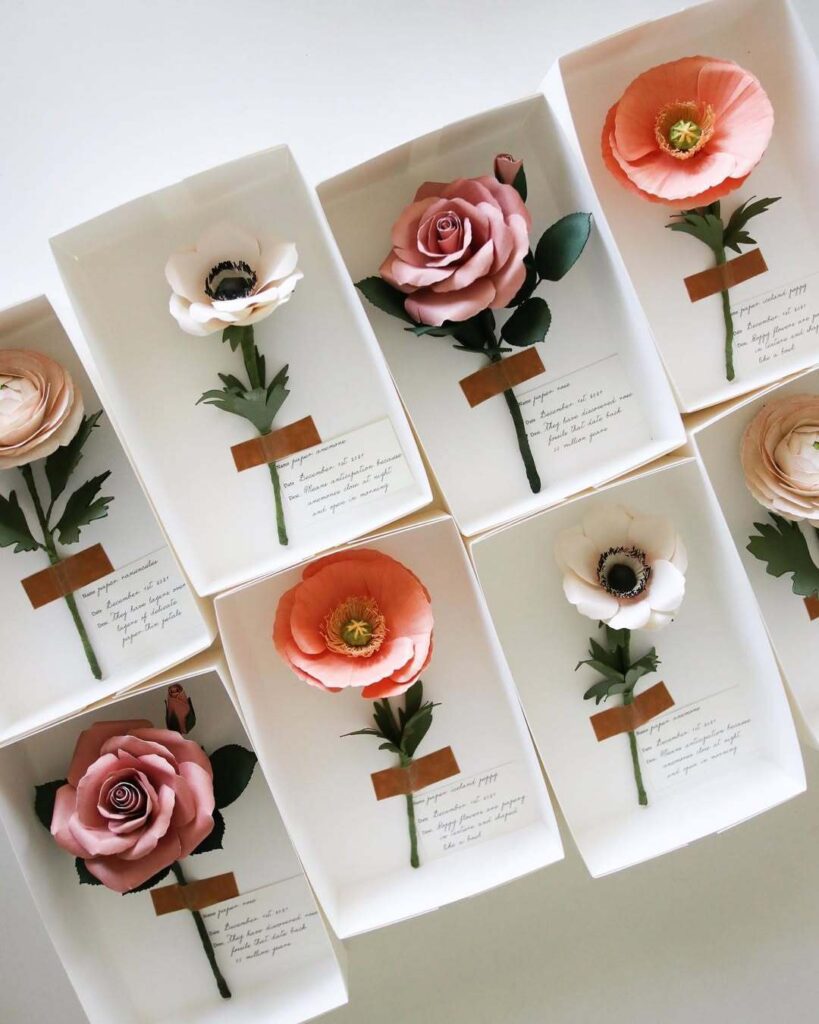
Dried Flower Pressed Card
Botanical and beautiful.
Press flowers for at least a week between heavy books (or buy pre-pressed flowers online). Arrange them on your card and glue them down with a thin layer of mod podge or glue stick. Small flowers like pansies, violets, or individual petals work best.
Add a simple sentiment in delicate lettering and maybe a touch of gold paint or pen for accent. The natural elements give the card an organic, romantic feel that’s really special.
Seal the flowers with a thin layer of mod podge or laminate the card front to protect the flowers and keep them from crumbling.
Materials Worth Having
If you’re planning to make multiple cards or get into card-making, these supplies are useful: cardstock in various colors (cream, white, red, pink), a good paper trimmer or sharp scissors, glue stick and craft glue, double-sided tape or foam mounting squares for dimension, decorative paper or scrapbook paper, ribbon and lace scraps, letter stamps or stickers, markers and pens in various colors, and embellishments like buttons, pearls, or rhinestones.
You don’t need everything. Start with what you have and add supplies as you try different techniques.
My Approach to Card Making
I usually make 3-5 cards at once in different styles, then choose which one I like best for each person. Making multiples is more efficient because you have all your supplies out anyway, and having options takes the pressure off making one perfect card.
My favorite cards I’ve made were actually the simplest ones: cream cardstock with vintage lace and a gold-stamped “love.” Sometimes I overthink it and add too much, and the simpler versions end up looking better.
The Real Appeal of Handmade Cards
In a world where everything is digital, receiving something physical and handmade is memorable. Your person can keep it, display it, or tuck it away somewhere special. They’ll remember that you took the time to make something specifically for them.
It doesn’t matter if it’s not perfect. The slight imperfections are what make it special and personal. A handmade card says “I cared enough to spend my time on this for you,” and that’s what Valentine’s Day is really about anyway.
So grab some paper, glue, and whatever decorative elements speak to you. Make something with your hands. Your person will love it not because it’s professionally executed, but because you made it for them. That’s the whole point.