Metal embossing definitely has a moment right now. And understandably so – tin and foil embossing creates stunning, dimensional art that looks professional and intricate. The best part? It’s surprisingly beginner-friendly. You’re basically drawing on thin metal sheets to create raised designs that catch light beautifully and add texture to any project.
Here are metal embossing ideas that range from simple home decor to personalized gifts, all achievable with basic supplies.
Getting Started: What You’ll Need
Essential supplies:
- Metal embossing sheets (aluminum, copper, or brass)
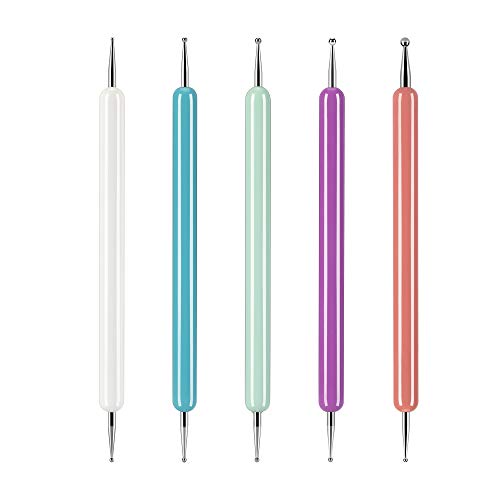
- Embossing stylus or ballpoint pen (that no longer writes)
- Soft surface to work on (mouse pad, foam pad, or thick magazine)
- Ruler or straight edge
- Pencil and paper for planning
- Scissors or metal shears
Optional but helpful:
- Embossing templates or stencils
- Patina solution for aging metal
- Clear sealant spray
- Liver of sulfur for darkening copper
- Steel wool for antiquing effects
Where to buy: Craft stores carry embossing kits and metal sheets in various sizes. Online retailers offer bulk packs that are more economical if you plan multiple projects.


Embossed Metal Bookmarks
Perfect starter project that makes thoughtful gifts.
What you’ll need:
- Metal sheet cut into bookmark-sized strips (6-7 inches by 2 inches)
- Embossing stylus
- Hole punch
- Ribbon or tassel
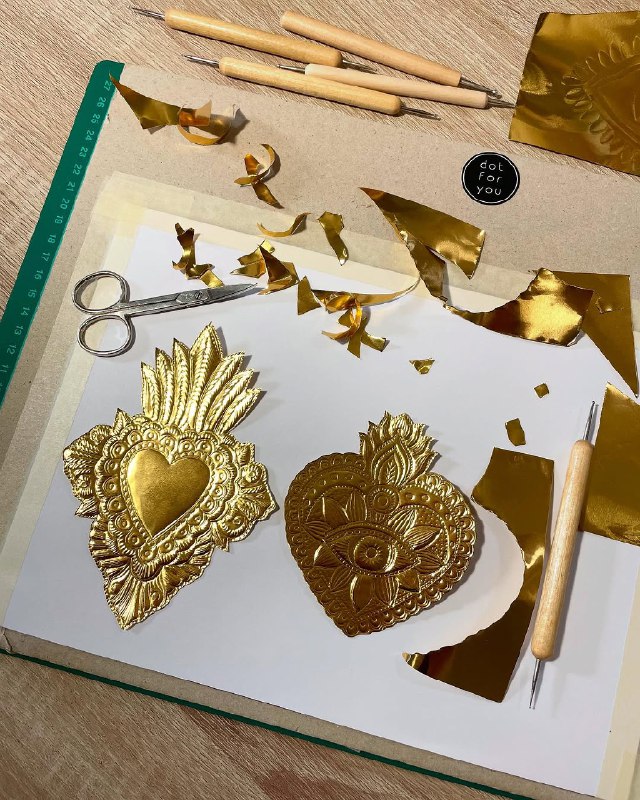
Creating the design: Plan your design on paper first—names, quotes, simple patterns, or decorative borders work well. Place the metal strip on your soft surface with the back facing up. Trace your design using the stylus, pressing firmly to create indentations.
Flip the metal over to see the raised design on the front. Add details by embossing from the front side to create depth. Punch a hole at the top and thread with ribbon or a tassel.
These make excellent teacher gifts, book club favors, or stocking stuffers.
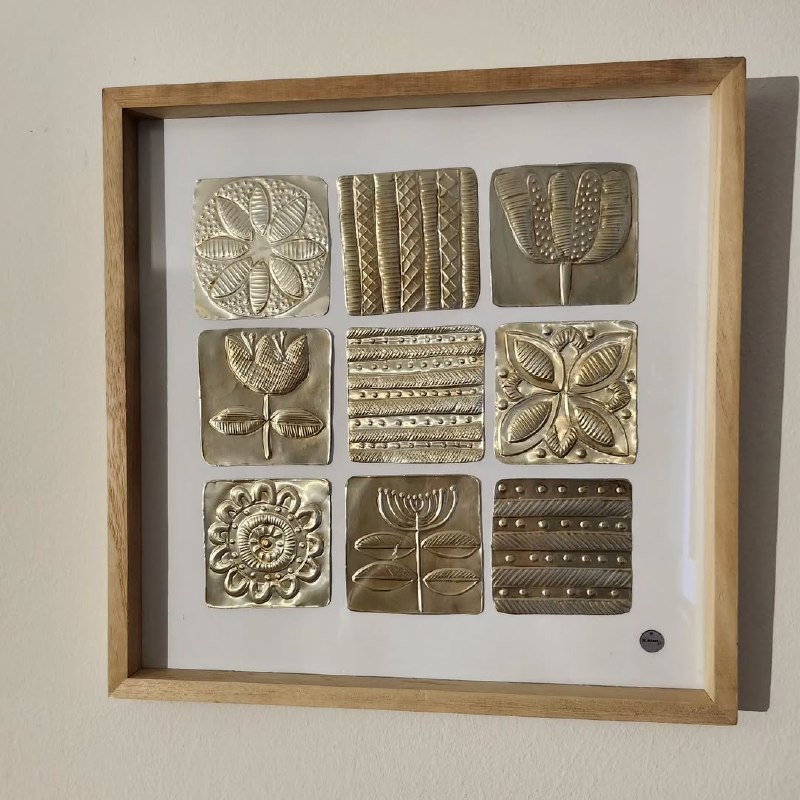
Embossed Metal Wall Art
Statement pieces that look gallery-worthy.
Materials needed:
- Large metal embossing sheet
- Frame or mounting board
- Design template (optional)
- Multiple stylus sizes for varied line width
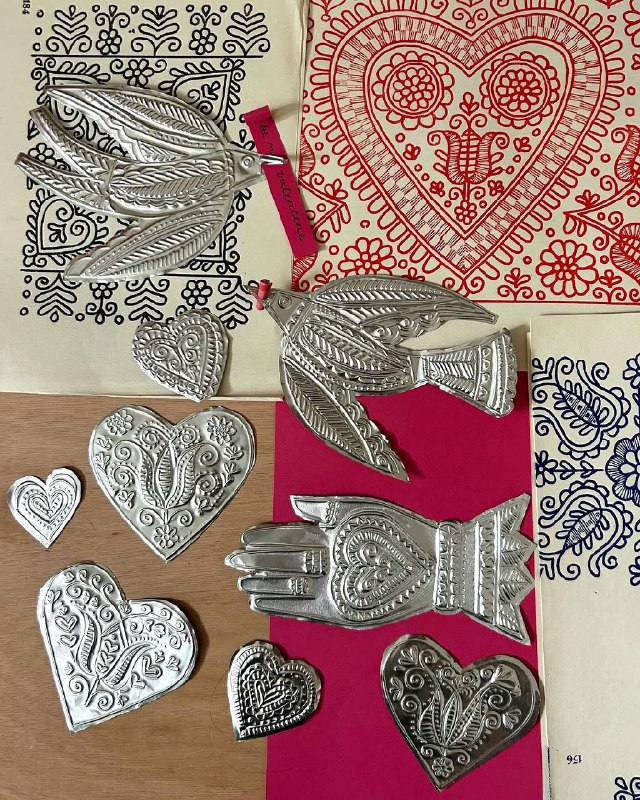
Creating dimensional art: Choose a design—mandalas, nature scenes, geometric patterns, or abstract designs all work beautifully. Sketch your design lightly on the metal with pencil, or place a template underneath (it will show through thin metal).
Work from the back to create the main raised elements, then flip and add details from the front for depth. Use different stylus sizes to create varied line weights—thin styluses for delicate details, thicker ones for bold outlines.
Finishing options: Leave the metal natural and shiny, apply patina for an antique look, or paint the recessed areas with acrylic paint for contrast. Frame the finished piece or mount on a backing board.
Embossed Metal Ornaments
Holiday decor with handmade charm.
Christmas ornaments: Cut metal into traditional ornament shapes—circles, stars, bells, or trees. Emboss holiday designs like snowflakes, holly, nativity scenes, or winter landscapes.
Punch a hole at the top for hanging ribbon. Leave shiny for modern appeal or antique for vintage charm. Add the year and give as gifts or keepsakes.
Year-round ornaments: Create embossed metal decorations for other seasons—sun shapes for summer, leaves for fall, flowers for spring. Hang in windows or on decorative branches.
Personalization: Add names, dates, or special messages to commemorate occasions. “Baby’s First Christmas,” wedding dates, or memorial ornaments all make meaningful keepsakes.
Embossed Metal Frames
Elevate ordinary frames into art pieces.
What you’ll need:
- Plain wooden or cardboard frame
- Metal embossing sheets
- Hot glue or strong adhesive
- Embossing tools
Creating the frame: Measure and cut metal to cover the frame front, allowing extra for wrapping around edges if desired. Emboss your design before attaching—this is crucial since you can’t emboss once it’s glued down.
Popular frame embossing patterns include corner flourishes, all-over geometric designs, names or dates, floral borders, or art deco patterns. Attach the embossed metal to the frame with strong adhesive.
These work beautifully for wedding photos, baby pictures, or as decorative accent frames. The embossed metal transforms a basic frame into something special.
Embossed Metal Tin Containers
Functional storage that’s decorative.
Starting materials:
- Plain metal tins or containers (mint tins, tea tins, small boxes)
- Embossing sheets to cover surfaces
- Adhesive
Customization approach: Cut metal to fit the tin surfaces. Emboss designs before gluing down—consider the tin’s purpose when choosing patterns. Monograms work well for personal items, florals for craft storage, geometric patterns for modern spaces.
Attach embossed metal pieces to the tin using strong craft glue. These make excellent containers for jewelry, sewing supplies, tea, or small gifts.
Gift idea: Fill embossed tins with homemade cookies, candies, or bath salts for personalized gifts that recipients can reuse.
Embossed Metal Cards and Gift Tags
Handmade greetings that stand out.
Greeting cards: Cut metal to fit on cardstock cards. Emboss simple designs—hearts for love notes, flowers for thank yous, or geometric patterns for any occasion. Attach embossed metal pieces to cardstock with strong adhesive.
The dimensional element makes these cards special and keepsake-worthy. Recipients often frame these instead of recycling them.
Gift tags: Create small embossed metal tags for gifts. Punch a hole and thread with ribbon or twine. Emboss names, “To/From,” or simple decorative elements.
These work especially well for wedding favors, holiday gifts, or special occasions where presentation matters.
Embossed Metal House Numbers
Curb appeal with custom touches.
Materials needed:
- Metal sheets
- Number stencils or templates
- Mounting method (screws, adhesive, or frame)
- Sealant for outdoor use
Creating numbers: Use large number templates to create clear, readable house numbers. Emboss deeply for maximum visibility and dimension. Cut around numbers or mount on backing plates.
Seal thoroughly if mounting outdoors. These add artisan charm to home exteriors and are much more interesting than standard metal numbers.
Alternative: Create embossed metal address plaques with house number and street name for a cohesive look.

Embossing Techniques for Better Results
Pressure matters: Press firmly but not so hard you tear the metal. Consistent pressure creates even lines and smooth embossing.
Work from both sides: Emboss major elements from the back for raised designs, then add details from the front for depth and dimension.
Use guides for straight lines: Rulers and straight edges help create clean geometric patterns. Hold firmly while tracing to prevent slipping.
Test first: Practice your design on paper, then test on scrap metal before working on your final piece.
Layer your designs: Create depth by embossing the same area multiple times or overlapping patterns for complex designs.
Smooth mistakes: Gently tap the metal flat from the opposite side if you make an error, or incorporate mistakes into the design.
Common Mistakes to Avoid
Working on hard surfaces: Always use a soft pad underneath. Hard surfaces don’t allow the metal to emboss properly and can damage your tools.
Choosing metal that’s too thick: Start with thin aluminum sheets (36 gauge is ideal). Thicker metal is much harder to emboss and requires more specialized tools.
Not planning your design: Sketch first. Once you’ve embossed, you can’t completely undo it.
Applying too much pressure: Start gently and build up. You can always go over an area again, but you can’t un-tear metal.
Ignoring sharp edges: Metal edges are sharp. Sand rough edges with fine sandpaper or use edge finishing tools.
Skipping sealant: Unsealed metal tarnishes and oxidizes. A simple spray sealant protects your work.

Safety Tips
Wear gloves: Metal edges can cut. Wear work gloves when cutting metal sheets.
Use proper cutting tools: Kitchen scissors won’t cut metal well and will dull. Use metal shears or heavy-duty scissors designated for metal.
Sand sharp edges: Always smooth cut edges with sandpaper or metal files before handling.
Work in ventilated areas: If using patina solutions or chemical finishes, work in well-ventilated spaces and follow safety instructions.
Protect your eyes: Wear safety glasses when cutting metal to protect from metal shards.
Why Metal Embossing Works
Metal embossing creates professional-looking results with minimal investment and skill. The dimensional quality catches light beautifully, adding interest that flat crafts can’t match. It’s versatile enough for modern or vintage aesthetics, durable for functional items, and impressive enough for gifts.
Plus, there’s something satisfying about creating raised designs with your own hands. It’s meditative, creative, and produces tangible results quickly.
With some inexpensive metal sheets and a stylus, you can create dimensional art, personalized gifts, and decorative pieces that look far more difficult than they actually are. That’s the beauty of metal embossing—high impact, low difficulty, and endlessly customizable.